Progress Check (4/20/21)

|
I created the sketch for my clock.
Since I don't have access to the clock hands/motor, I wasn't able to start modelling it in Inventor, so I spent the rest of my time in class catching up on work for other classes. There wasn't really any particular inspiration for my clock, I just suddenly came up with the design. (Yes, I did the sketch on an index card. I was lazy, and it was the only piece of paper I had near me.) |
Progress Check (4/22/21)
|
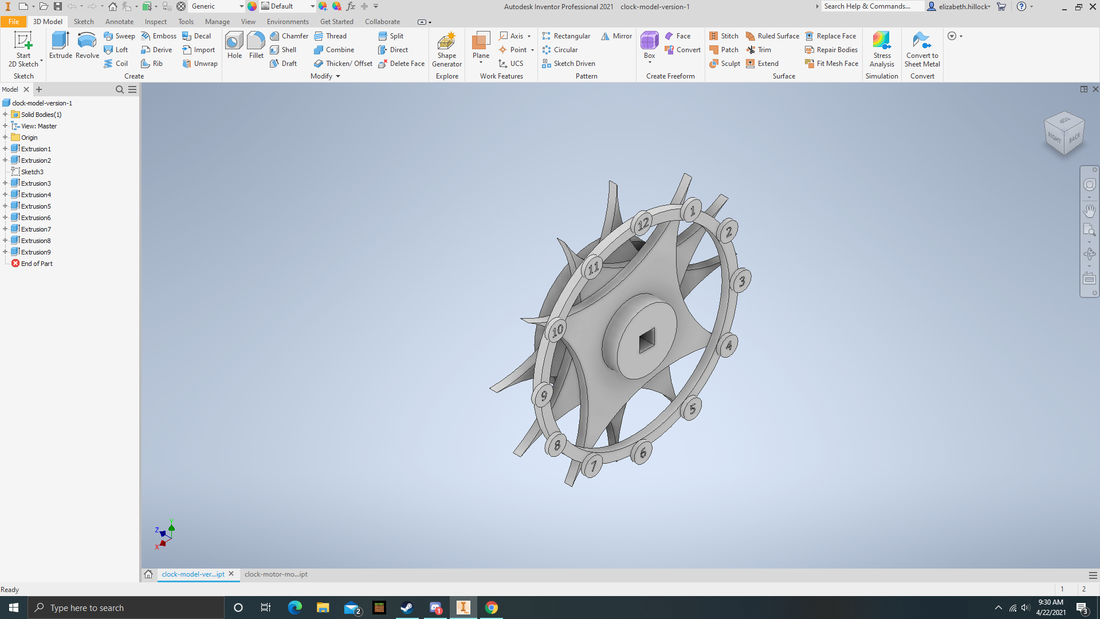
Since I had to wait to be able to model the clock motor before I could really start on my clock, I just spent the past two days creating a rough model of my clock in Inventor (shown to the right) and working on stuff for other classes.
I was planning on designing the clock motor/hands on Monday and getting started on designing my actual clock (not just a rough sketch of it) as soon as possible afterwards. |
|
Progress Check (4/27/21)
|
|
Created individual parts for V.2 of clock (V.2 was created after I modeled the clock motor parts and the second hand). V.2 is mainly to get a general idea of how the individual parts are going to work.
V.1 was created to get a rough sketch of the entire clock's design, while V.3 will be the first draft of how the clock will be assembled in real life. |


Progress Check (5/3/21)
|
I completed the drawings file for V.3 of the clock and its individual parts and started on the fabrication files for the parts.
Unfortunately, due to AP exams, I won't be able to work both on Tuesday and Thursday of this week and Wednesday and Friday of next week, and since basically all of my time not in school during this week and next week will be spent studying, that means it'll take more time for me to assemble the clock compared to if I didn't have AP exams going on. |
| ||
Progress Check (5/7/21)
|
I completed the laser cutting file for the study model.
I was hoping to have it laser cut over the weekend, pick it up on Monday, and work on it during class Tuesday and Thursday (as previously mentioned, I won't be able to work on it on Wednesday and Friday due to AP exams), then create the fabrication files for the final model next week on Monday/Tuesday, wait for it to be fabricated/laser cut, then make it as soon as possible. | ||
Progress Check (5/10/21)
|
I finished the current version (V.3) of the Inventor models and fabrication files for the final clock model. It was difficult trying to figure out how to create the outlines I needed in order to make sure each piece was properly aligned while I was assembling it, but I managed to figure it out eventually, like how there's a hole in one of the clock number disk outlines on the disk holding ring (shown below) that aligns with the hole outline on one of the ends of the 60°-offset clock part.
I intend pick up the clock study model parts either after school today (Monday) or after my AP exam on Wednesday. |
| ||||


Progress Check (5/13/21)
|
I finished the laser cutting file for the final model. It's going to be made of the same material as the study model, and I only really need to laser cut new parts for the study model parts that I actually changed (the final model images for the two parts I changed are above).
I'm hoping to send the fabrication files off today, I'm not doing anything tomorrow (Friday) because of my final (!!!) AP exam, so I'm hoping to pick up the final model parts next week and finish the clock next week. I know its not for a grade, but I don't want to have a whole bunch of parts that I end up not even using holed up in my basement. | ||
Progress Check (5/21/21)
|
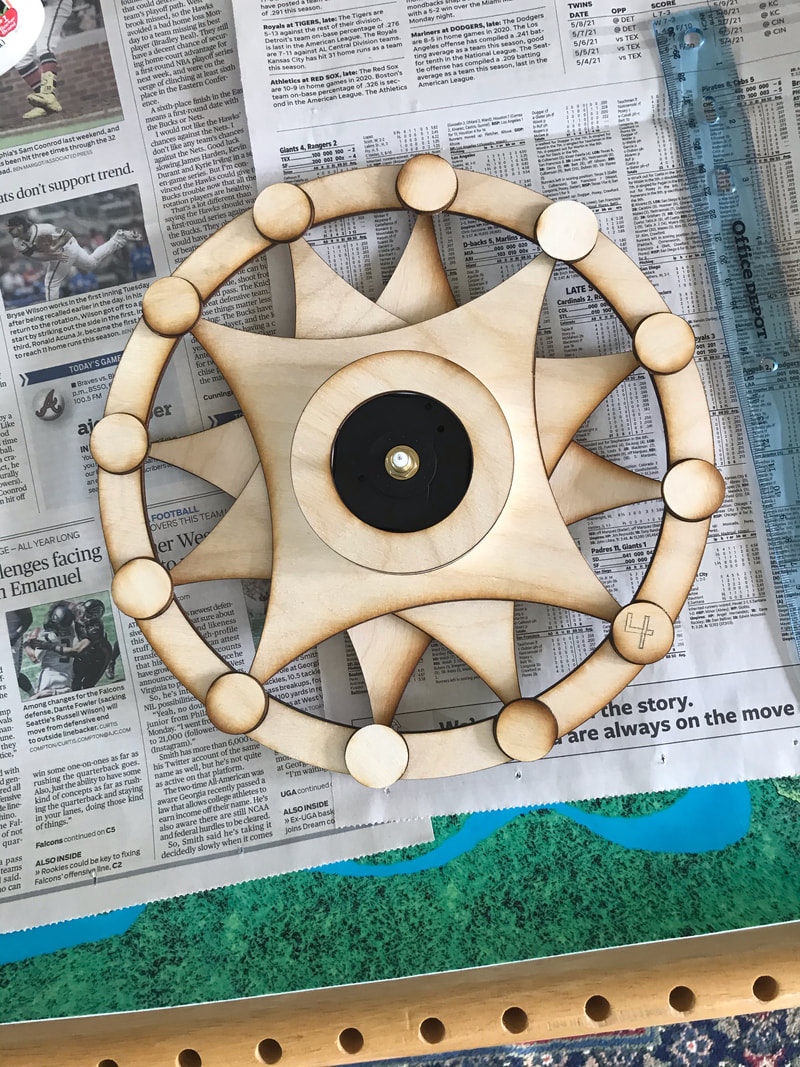
I finished assembling the final model of my clock! The only thing left to do is to write the numbers on each of the circles (I've already started on the 4, as you can in the image to the right). I didn't use the laser cutter to write the numbers on each of the number disks because I was an idiot who didn't plan ahead.
Since the sound of a ticking clock annoys me really badly, this clock is purely for decoration (I'm saying this because I didn't put a battery in the clock motor, and I couldn't now even if I wanted to because the parts trapping it have already been glued down). |
|
